Okay, so again before this
tutorial, you want to make sure your nails, and hands, are in good condition.
-
Start by making
sure you have no remaining nail polish on your nails.
-
It’s a good idea
to moisturize your hands regularly, maybe before bed?
-
Remember your
cuticles! Cuticle oil, or almond oil, will nourish these.
For both tutorials you will
need:
-
a strong white
nail polish
-
a basic top coat
polish
-
nail polish
remover
French Manicure
On to the classic, the French
manicure! You can find high and low tutorials on the old-school French mani,
however today I’m putting a spin on this old girl.
You will need:
-
a sheer pink or
peach, a neutral colour
-
a dotting tool,
you could use a skewer or tooth pick here
Let’s start!
1.
Begin by painting
a classic white French tip over the top of your nails. If you are a little
inexperienced, and/or it got messy, use some polish remover to clean that up
now.
2.
Get out your
dotting tool! Just below the French tip, make a row of dots. Depending on your
nail/dot tool size, the amount of dots could be from 4 to 6. Try to make them
as even as possible.
3.
Between the dots
you just made and the tip, make another row of dots where they fit. Not
directly above the dots you’ve made, but diagonally.
4.
If you’d like an
accent nail, choose a nail or few to fill in with dots, like so.
5.
After the polish
has dried, polish over with a thin coat of your neutral-coloured nail polish
6.
After that coat
has dried, apply a top coat to ensure a longer life!
Voila, cést tres mignon, non?
I hope you like!
Vintage Red
Now, for something a little
more show-stopping, red, red, red! The vintage classic, with another twist!
You will need:
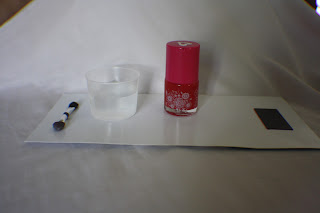
- Either one really
strong red polish or 3 reds in varying dark/light tones.
-
Card
-
Dipping water
-
Mini brush
Start your engines!
1.
Apply a strong
white coat of nail polish to your whole nails.
2.
Find your lightest
shade of polish, or begin mixing your polish on a piece of card, add water to
dilute it. I didn't like the use of water as well as different polishes, as nail polish is a
3.
Apply this shade
like a very thick French tip with a mini brush, you can see here an example of
width.
4.
After the previous
coat has dried, apply the second shade darker (by either mixing a new diluted
colour, or a different polish) so that you can still see the first shade, leave
a few millimetres, or whatever your preference. Repeat as many times as you
prefer, leaving a tip for whatever size preference.
5.
It may end up
messy so you may need to go over spots or remove spots.
6.
Apply a very thin
layer of non-diluted red over the entire nail
7.
Finish again with
a top coat, you can’t go wrong here!
Achieving this look takes
practice, so good on you if you mastered it (I know I haven’t, yet)! If not,
there’s always next time.
Also, I have to share with you
my most recent purchases! I bought so much this week it feels like a waste If I
don’t. 3 pencil skirts, a dress, sunglasses, a purse, a card holder/wallet and a cardigan and tank top set.
In total it all cost me $35, not too bad if I say so myself!
This post was a challenge
taking all of those photos! I’m rather glad how it turned out though. I hope you
enjoyed it! Maybe it could be a little project for this Sunday afternoon, how
nice. My next post will be titled ‘Channeling Your Inner (Audrey) Hepburn – Funny Face’, I hope you will tune in to see
it on Wednesday morning (GMT 10+).
Love Claire, xo.


No comments:
Post a Comment
I appreciate every blogger, every reader and all feedback.
I will happily answer all questions that you many have.
Have a nice day!